Cookies burning at the setting that used to work, roasts coming out undercooked, baked goods collapsing in the middle – an oven temperature that is not accurate is a real problem with real consequences. The good news is that most causes are identifiable without specialized tools, and many are fixable without a service call. This guide covers the six most common reasons oven temperature goes wrong, with clear steps to diagnose and fix each one.
First: confirm your oven temperature is actually off
Before assuming the oven has a hardware fault, confirm the problem with an independent oven thermometer. Every oven, even a brand-new one has some deviation between the set temperature and the actual cavity temperature. A variance of plus or minus 15 to 25 degrees Fahrenheit is considered normal by most manufacturers and can be corrected through the oven’s calibration offset (more on that below).
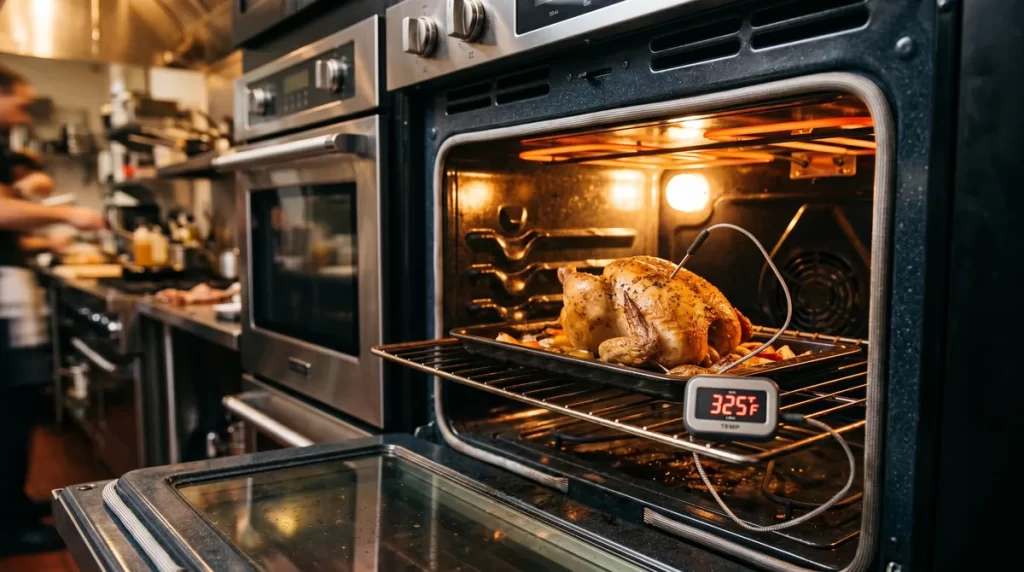
A reliable oven thermometer costs $10 to $20 at any kitchen or hardware store. Place it in the centre of the middle rack. Set the oven to 350 degrees Fahrenheit and let it run for 20 minutes after the preheat indicator goes off. Note the reading. Test at 400 degrees Fahrenheit as well. A consistent offset of 25 degrees Fahrenheit or more, or variance that changes significantly between temperature settings, points to an actual fault rather than normal calibration drift.

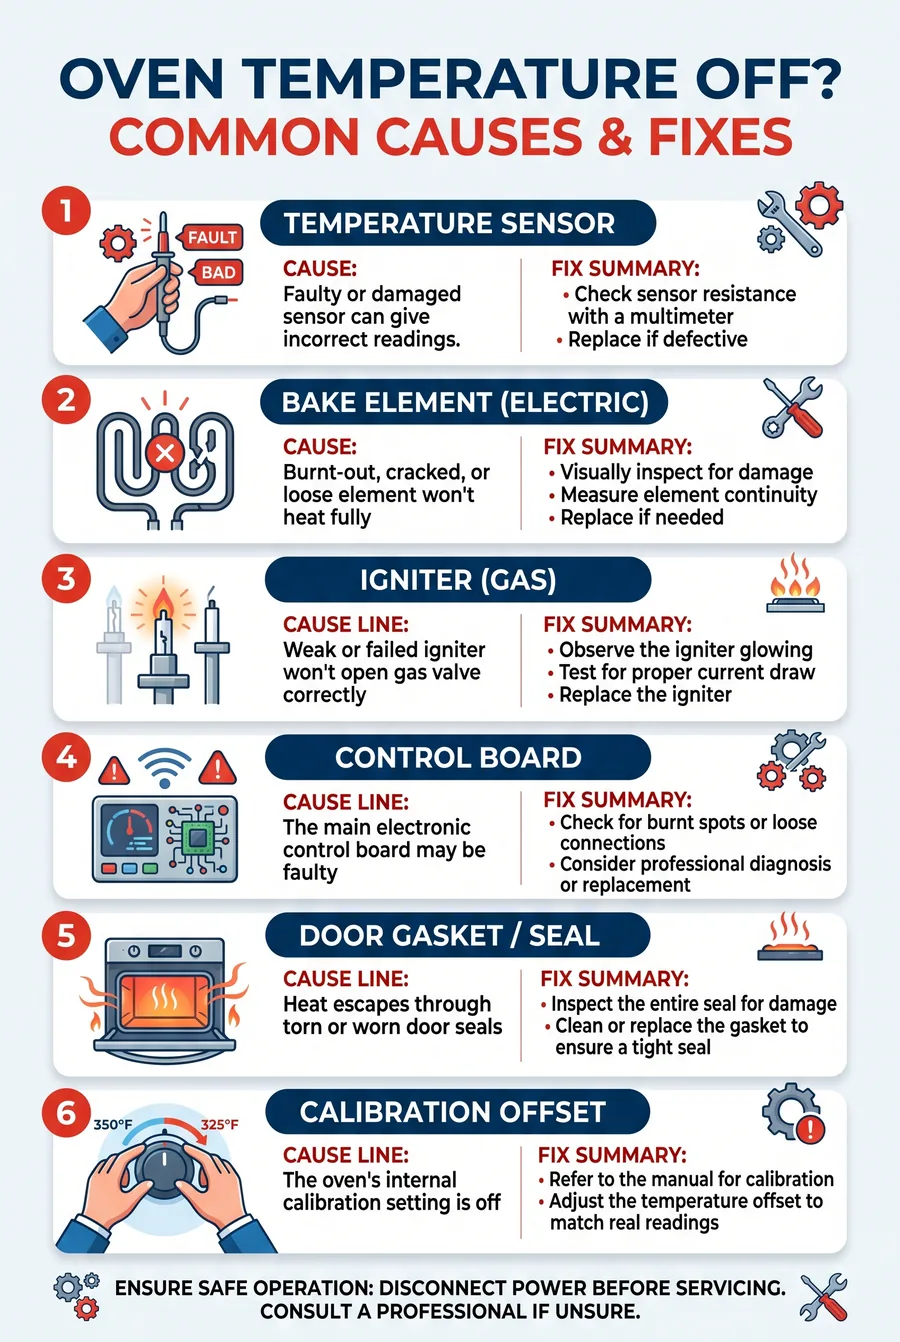
1. Failed temperature sensor
The oven temperature sensor is a probe that extends into the oven cavity and sends a resistance reading to the control board, which uses that reading to regulate heat. When the sensor fails or drifts out of calibration, the control board gets incorrect information and the oven runs consistently too hot or too cold.
How to test: Pull the sensor out from its mounting bracket (usually two screws at the back interior wall of the oven). Test resistance with a multimeter. At room temperature (70 to 75 degrees Fahrenheit), most oven temperature sensors should read approximately 1,000 to 1,100 ohms. Check your model’s specification — the exact target varies by manufacturer. A reading far outside this range (significantly higher or lower) confirms sensor failure.
Fix: Replacement sensors run $15 to $50 for most models. Installation is a straightforward DIY repair: unplug the oven, remove the old sensor and its wiring harness, connect the new sensor, and remount. Most sensors are model-specific, so confirm the part number matches your oven before ordering.
2. Partially failed bake element (electric ovens)
A bake element that is beginning to fail but has not yet completely burned out can produce inconsistent, lower-than-expected temperatures. The element may glow in some sections but not others, or cycle on and off with less heat output than normal.
Visual check: Set the oven to bake and watch the element during preheat. A healthy element glows uniformly red. Dark spots, uneven glow, or blistering on the element surface indicate a partial failure that will worsen over time.
Fix: Replace the bake element. Most bake elements run $25 to $60 for the part. Disconnect the oven from power, remove the two mounting screws at the back of the oven interior, pull the element forward to expose the wiring connectors, disconnect, and reverse the process with the new element. This is one of the most DIY-accessible oven repairs.
3. Weak igniter (gas ovens)
In a gas oven, the igniter serves a dual purpose: it glows to ignite the gas, and its current draw is what opens the gas valve. As igniters age, they draw less current. A weak igniter may still glow enough to ignite gas occasionally, but it takes longer, and the result is a longer, weaker heat cycle that leaves the oven consistently below temperature.
Test: Start the oven on bake and watch the igniter through the broil/bake element area (you may need to remove the oven floor panel). A healthy igniter glows bright orange-white and opens the gas valve within 30 to 90 seconds. A weak igniter glows dull orange and takes over 90 seconds, or the flame stays low. Igniter replacements run $25 to $60 and are a standard repair for gas oven temperature problems.

4. Worn door gasket
The oven door gasket seals the hot cavity during cooking. A worn, torn, or loose gasket allows significant heat to escape, forcing the oven to cycle more frequently to maintain temperature — and resulting in actual cavity temperature running below the set point, particularly during longer cooking sessions.
Check: Run your hand along the oven door frame while the oven is at temperature (carefully — the frame can be hot). If you feel heat escaping around the edges, the gasket has failed. Visually inspect the gasket for tears, flattened sections, or areas where it has pulled away from the frame groove.
Fix: Most oven door gaskets simply press into a channel around the door frame, requiring no tools to remove and replace. Replacement gaskets run $15 to $40. Confirm the part number matches your oven model — gasket profiles vary significantly between manufacturers.
5. Faulty control board
The electronic control board manages every oven function, including interpreting the temperature sensor signal and cycling the bake element or gas valve accordingly. A failed relay or damaged board component can cause the oven to run hot, cold, or inconsistently.
Control board failure typically appears after ruling out the sensor and element — the oven temperature tests wrong with a confirmed-good sensor. Board replacements run $100 to $300 depending on the model. On ovens over 12 years old where the board cost approaches 40 percent of replacement cost, weigh this repair carefully.
6. Calibration offset (not a fault – an adjustment)
Many modern ovens include a hidden calibration offset setting that lets you adjust the temperature reading up or down by 25 to 35 degrees Fahrenheit without any repair. This is the right first step if your oven’s deviation is consistent (always 20 degrees low, for example) and within a small range.
The calibration procedure varies by brand and model. On many GE, Frigidaire, and LG models, it involves holding the Bake button for several seconds until a calibration screen appears. On Whirlpool models, it is often accessed through the Settings menu. Consult your model’s user manual for the exact steps — it is usually available via the manufacturer’s support website by model number.
When calibration is not enough: If your oven is off by more than 35 degrees Fahrenheit consistently, or if the offset changes depending on the target temperature (50 degrees off at 350 degrees, but 75 degrees off at 450 degrees), calibration adjustment will not resolve the problem. A hardware fault is the cause.
Important note
Disclaimer: This article is for general guidance only. Costs, products, regulations, and best practices change. Max Appliance Repair Hamilton is not liable for outcomes from actions taken based on this content. Always confirm with a licensed appliance technician for your specific situation. Gas oven repairs involving supply lines, regulators, or valve bodies must be performed by a licensed gas technician.
Frequently asked questions
Oven repair in Hamilton
If the oven temperature problem requires more than a calibration adjustment, Max Appliance Repair provides oven repair in Hamilton with same-day and next-day appointments. Our technicians carry common oven sensors, elements, and igniters on every truck, so most repairs are completed on the first visit.
Download: Oven Temperature Diagnostic Checklist (PDF)
A step-by-step checklist covering all 6 causes with test procedures on one printable page.
Sources and references
- RepairClinic — Oven Temperature Not Accurate Repair Help
- Consumer Reports — Range and Oven Ratings, Reviews, and Reliability

Written by
Tomasz W.
DIY appliance repair researcher and home improvement writer
Tomasz specializes in front-load and high-efficiency washer repair across older Hamilton neighbourhoods where hard water and basement humidity wreak havoc on bearings, pumps, and door boots. He has rebuilt every major front-load brand sold in Canada since 2008 and trains junior techs on tub bearing replacement.